Embarking on an interior design project, whether it is a small room refresh or a complete home renovation, brings with it a whirlwind of choices. From paint colors and flooring types to lighting fixtures and fabric textures, the sheer volume of decisions can feel overwhelming for both the designer and the client. Keeping track of every single material and finish across multiple spaces is not just a challenge; it is a monumental task that requires impeccable organization to ensure a smooth, successful outcome.
This is where the unsung hero of project management steps in: the finish schedule. Imagine a detailed roadmap that outlines every material choice for every surface and item in a design. It is the backbone of clear communication, helping everyone involved, from contractors to suppliers, understand the exact specifications. Without this crucial document, projects can quickly descend into confusion, leading to costly errors, delays, and a less than ideal final product.
Why Every Interior Designer Needs a Robust Finish Schedule
Diving into an interior design project without a comprehensive finish schedule is a bit like setting off on a long road trip without a map. You might eventually get to your destination, but you are likely to encounter many detours, wrong turns, and unnecessary stops along the way. The absence of a detailed plan often results in miscommunications between the designer, client, and contractors, leading to incorrect orders, mismatched materials, and significant budget overruns. These issues not only create stress but can also damage professional relationships and the overall reputation of a design firm.
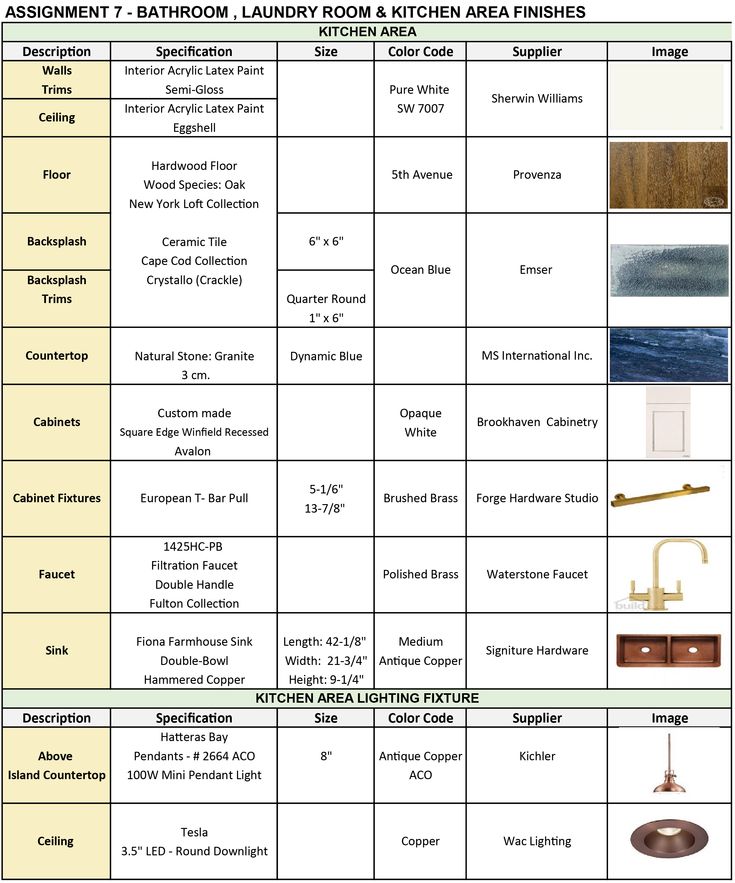
A finish schedule, at its heart, is a comprehensive document that meticulously lists every material, finish, and fixture chosen for a project. It serves as a central hub of information, ensuring that everyone involved is on the same page regarding the precise specifications for each element within the design. This level of detail reduces ambiguity, minimizing the chances of misunderstandings that can plague complex projects. It is a proactive tool that addresses potential problems before they even arise, saving time, money, and headaches.
Beyond preventing errors, a well-structured finish schedule significantly enhances the client experience. When clients see a clear, organized document detailing every selection, it instills confidence and reassures them that their investment is being managed with the utmost professionalism and attention to detail. This transparency builds trust and strengthens the client-designer relationship, often leading to repeat business and valuable referrals. It allows for clearer discussions, easier approvals, and a smoother decision-making process throughout the project lifecycle.
Ultimately, integrating a comprehensive finish schedule into your design workflow elevates your professionalism and streamlines your projects from conception to completion. It becomes an indispensable asset, fostering efficiency, accuracy, and client satisfaction. For any interior design professional aiming for excellence, understanding and utilizing a finish schedule is not just beneficial; it is absolutely essential.
Key Components of an Effective Finish Schedule
- Room or Area: Clearly identify the specific space each finish applies to.
- Element or Item: Categorize what is being specified such as flooring, walls, ceiling, millwork, or plumbing fixtures.
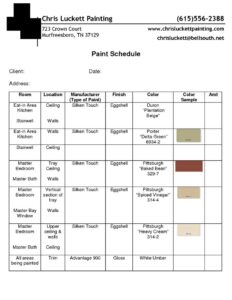
- Material Specification: Provide precise details including the manufacturer, product name, model number, color, finish, and size.
- Supplier or Vendor: Note where the item is being sourced from, along with contact information if necessary.
- Quantity or Area: Include measurements or quantities needed for ordering, crucial for accurate budgeting and purchasing.
- Notes or Special Instructions: Add any unique installation requirements, lead times, or custom details.
Crafting Your Ideal Finish Schedule Template Interior Design
Building your own finish schedule template does not have to be an intimidating task. You can start with something relatively simple and expand its complexity as your projects grow. Many designers begin with a basic spreadsheet program like Microsoft Excel or Google Sheets, which offer enough flexibility to create a highly functional document. The key is to establish a clear structure that works for your specific workflow and can be easily understood by all project stakeholders. Think about the categories of information that are most critical to your projects and design your columns accordingly.
The process of populating your finish schedule begins by systematically going through each room and identifying every surface and item that requires a finish specification. This meticulous approach ensures that nothing is overlooked. For instance, when you are in the living room, you would list the flooring material, wall finishes, ceiling paint, trim details, and any built-in millwork. Then, for each of these elements, you would document the precise details as discussed earlier – manufacturer, product name, color, and any special notes. Consistency in how you record this information across all rooms is paramount for clarity.
It is also important to consider the lifecycle of your finish schedule. It is not a static document; rather, it is a living, breathing component of your project documentation that requires regular updates. As decisions are finalized, materials are ordered, or changes inevitably occur, the finish schedule must be revised to reflect the most current information. Sharing these updates promptly with your team, clients, and contractors ensures that everyone is always working from the latest version, further preventing miscommunication and costly errors.
When you’re looking to streamline your process, having a solid finish schedule template interior design is incredibly valuable. It helps in standardizing your approach to material selection and documentation. Developing a template means you are not starting from scratch with every new project, saving you valuable time and effort. It also means that your documentation will consistently meet your standards, projecting a highly organized and professional image to your clients and collaborators.
- Begin with a foundational structure that clearly categorizes all essential information.
- Be incredibly precise with all product specifications, including SKUs, codes, and finish names.
- Incorporate supplier and vendor contact details for quick reference during procurement.
- Schedule regular reviews and updates of the document throughout the project duration.
- Ensure all key project members and the client receive the most current version of the schedule.
Integrating a well-maintained finish schedule into your interior design workflow is more than just good practice; it is a powerful strategic advantage. It transforms the often-chaotic nature of material selection and procurement into an organized, predictable, and highly efficient process. This level of meticulous planning significantly reduces stress, minimizes the likelihood of costly mistakes, and ultimately ensures that every design vision is brought to life exactly as intended.
The result is not only a beautifully executed project that delights your clients but also a reputation for unparalleled professionalism and reliability. By embracing this essential organizational tool, you empower yourself to manage complex projects with greater ease and confidence, leading to smoother installations and happier clients who appreciate the attention to detail and flawless execution.