Embarking on an interior design project, whether for a cozy home or a sprawling commercial space, involves a symphony of decisions. From the subtle shade of paint on the walls to the texture underfoot, every choice contributes to the final aesthetic and functionality. Keeping track of all these elements can quickly become overwhelming, turning an exciting creative process into a daunting organizational challenge.
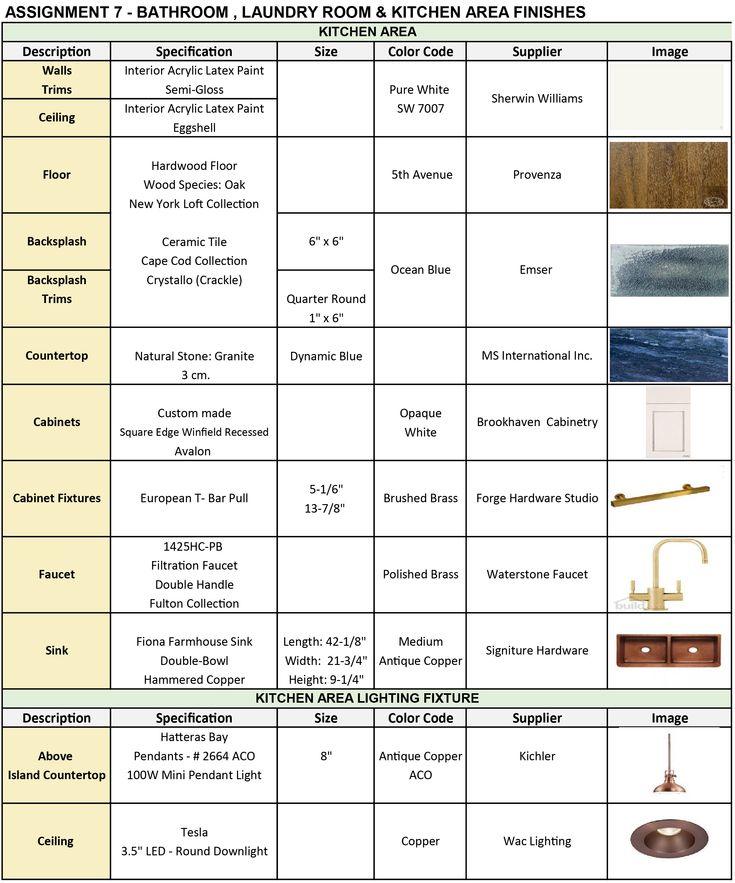
This is precisely where a powerful tool steps in: the interior finish schedule. More than just a list, it’s a comprehensive roadmap detailing every surface material, fixture, and finish specified for a project. For designers, contractors, and clients alike, having a clear, organized document that outlines these selections is paramount to success, preventing miscommunication and ensuring that the vision translates perfectly into reality.
Why an Interior Finish Schedule is Your Design Lifeline
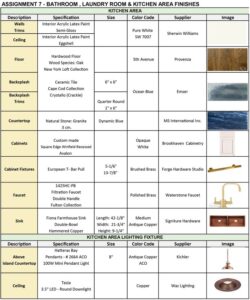
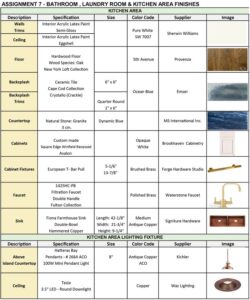
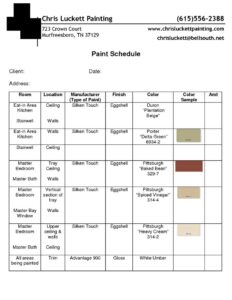
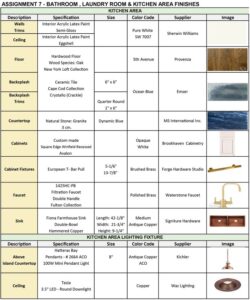
An interior finish schedule is essentially a detailed ledger that meticulously documents every material, finish, and fixture intended for each area within a project. Think of it as the ultimate cheat sheet for your design, specifying everything from flooring, wall finishes, and ceiling treatments to cabinetry, countertops, plumbing fixtures, and lighting. It breaks down the entire space into manageable components, ensuring no detail is overlooked.
The primary purpose of this vital document extends far beyond mere record-keeping. It serves as a central communication hub, bridging the gap between the designer’s creative vision, the contractor’s execution plan, and the client’s expectations. By providing unambiguous specifications, it significantly reduces the potential for costly errors, material mix-ups, and time-consuming reworks during the construction or renovation phase.
Imagine the chaos of a project without a clear finish schedule: a builder installing the wrong tile, a painter using an off-spec color, or a client questioning a material choice months after the decision was made. A well-prepared schedule acts as an unshakeable reference point, offering clarity and accountability for every material selection, helping to keep the project on budget and on schedule. It’s a proactive step towards a smoother, more predictable design journey.
Beyond its practical applications during construction, the finish schedule also serves as a critical document for procurement. It helps in generating accurate material take-offs, soliciting bids from suppliers, and managing orders. For clients, it offers a tangible representation of the proposed design, allowing them to visualize and approve every selection before work even begins, fostering trust and transparency throughout the project lifecycle.
Key Elements to Include in Your Finish Schedule
-
Area/Room Identification: Clearly define where each finish will be applied (e.g., “Master Bathroom Floor,” “Living Room Walls”).
-
Finish Category: Specify the type of finish (e.g., “Flooring,” “Wall Finish,” “Cabinetry,” “Fixture”).
-
Material/Product: Name the specific material or product (e.g., “Porcelain Tile,” “Latex Paint,” “Quartz Slab”).
-
Manufacturer/Brand: Identify the source (e.g., “Daltile,” “Sherwin-Williams,” “Caesarstone”).
-
Model/Series/Color Code: Provide exact identifiers (e.g., “Keystone 2×2,” “SW 7006 Accessible Beige,” “Calacatta Nuvo 5031”).
-
Finish/Texture: Describe the specific finish (e.g., “Matte,” “Polished,” “Satin,” “Brushed”).
-
Notes/Remarks: Add any special instructions, installation methods, or specific details (e.g., “Herringbone pattern,” “Grout color,” “Adhesive type”).
-
Quantity/Unit: If applicable, approximate quantities or units for ordering (e.g., “120 SF,” “5 Gallons,” “3 Pieces”).
Crafting Your Perfect Interior Design Interior Finish Schedule Template
While the concept of an interior finish schedule is invaluable, its true power comes from a well-structured template. A standardized interior design interior finish schedule template provides a consistent framework for all your projects, saving countless hours of setup time and ensuring that no critical information is ever missed. It transforms a potentially arduous task into an efficient part of your design workflow, allowing you to focus more on creativity and less on administrative overhead.
Creating your own template doesn’t have to be complicated. Most designers start with a spreadsheet program like Excel or Google Sheets, which offers excellent flexibility for custom columns, sorting, and filtering. You can set up your essential categories as column headers, pre-populate common notes, and even incorporate drop-down menus for frequently used manufacturers or finish types, further streamlining data entry. The goal is to build a system that aligns perfectly with your design process.
Beyond basic spreadsheets, many project management software solutions and specialized interior design platforms now offer integrated finish schedule functionalities. These often include features like linking directly to product databases, generating automatic material take-offs, and even creating visual mood boards tied to your selections. Investing in such tools can significantly enhance efficiency, especially for larger firms handling multiple concurrent projects.
When customizing or selecting your interior design interior finish schedule template, consider the level of detail required for your typical projects. Some projects might need extremely granular specifications for every fixture, while others might focus more on broad material categories. Tailor your template to strike the right balance, ensuring it’s comprehensive enough to prevent errors but not so cumbersome that it becomes a burden to fill out. Regularly review and refine your template based on project feedback to ensure it remains a dynamic and effective tool.
Ultimately, the successful execution of any interior design project hinges on meticulous planning and clear communication. By embracing the power of a well-defined interior finish schedule, designers can navigate the complexities of material selection and installation with confidence and precision. It’s an investment in clarity that pays dividends in saved time, reduced stress, and consistently high-quality outcomes.
Integrating this powerful organizational tool into your standard operating procedures elevates your professionalism and enhances client satisfaction, ensuring that every design vision is brought to life exactly as intended. It empowers you to transform creative concepts into tangible, beautiful spaces, project after project.